Disabling a plugin from the WordPress dashboard is easy. However, an update or a conflict between two plugins can sometimes break your website and block access to the admin dashboard.
That’s why in this guide, I will show you 4 different methods to deactivate a WordPress plugin, even if you lose access to the admin dashboard.
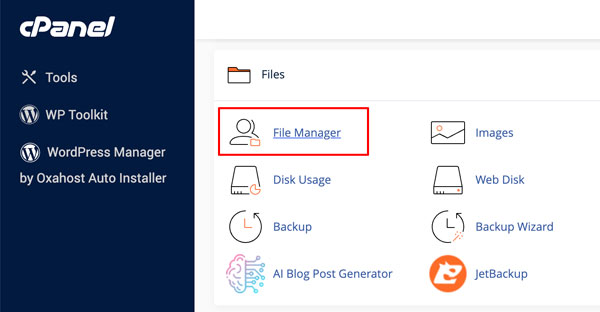
Method 1. How to Disable a WordPress Plugin via cPanel’s File Manager?
cPanel comes with a powerful file manager that allows you to access the WordPress installation folder and manage its content.
If your hosting plan comes with cPanel, we can use it to disable any plugin(s) without accessing the admin dashboard.
Step 1. Open your cPanel dashboard and navigate to the File Manager.
Step 2. From the WordPress installation folder (usually named public_html), navigate to /wp-content/plugins.
Step 3. Inside this folder, you will see a list of folders. Each one represents a plugin installed on your website.
To disable a plugin, simply rename its folder by adding a random suffix. For example, wp-super-cache becomes wp-super-cache.old.
Step 4. Now try to access the WordPress dashboard. This step is important in order for WordPress to refresh the list of active plugins.
If the plugin you are trying to deactivate is the reason you can’t access the dashboard in the first place, you should now be able to access it again.
Also, you should receive an error message that the plugin was deactivated because its file no longer exists, like this:

Step 5. If yes, please go back to step 3 and rename the folder to its original name.
However, if you still can’t access your admin dashboard, you might want to disable all plugins together.
How to Disable All Plugins?
To disable all plugins at once, simply rename the plugins folder found at /wp-content to something like plugins.old.
Now try to visit the dashboard. If you can access it, go to the Plugins page. All your plugins are now deactivated.
Don’t forget to rename the plugins folder to, well, plugins. After that, you can open the Installed Plugins page from the dashboard and activate your previously active plugins one by one until you find the problematic plugin.
Now it’s up to you to deal with this plugin. You can try to fix it, contact its developer for support, or completely remove it.
Method 2. How to Disable a WordPress Plugin via FTP?
You can disable plugins via FTP if you can’t access cPanel.
There are plenty of FTP programs you can use. FileZilla is the most popular.
Step 1. To access your WordPress files via FTP, open FileZilla and enter your FTP credentials as in the screenshot below, then click Quickconnect:
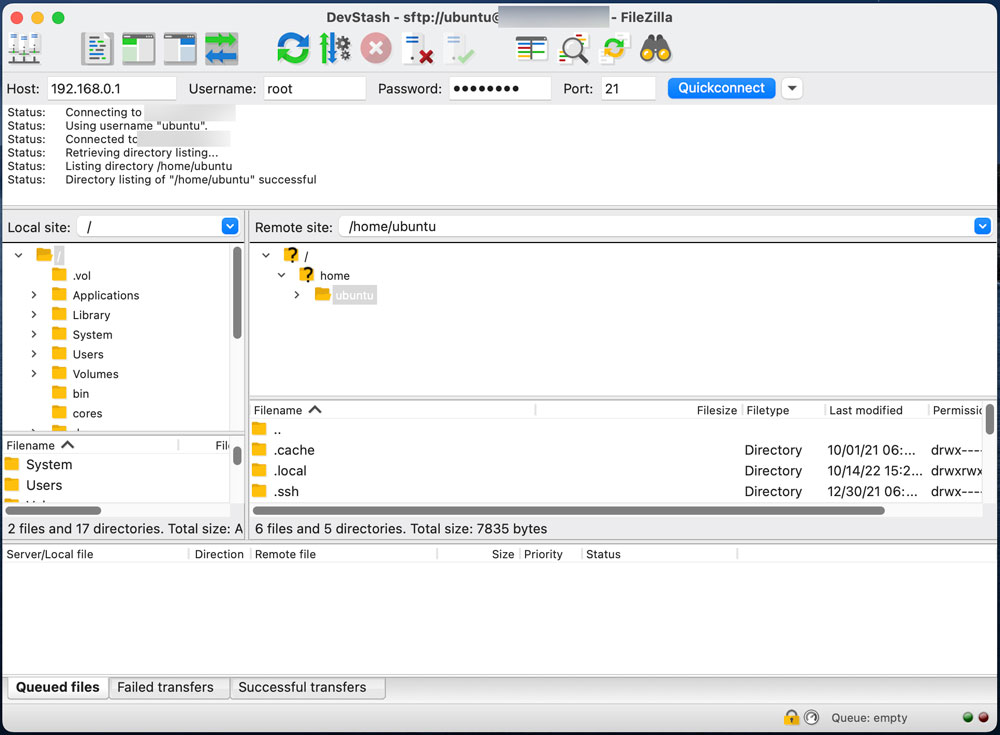
- Host: This is your server IP address
- Username: This is the username of the user with FTP access privileges.
- Password: This is the FTP user password.
- Port: By default, the FTP port is 21 (or 22 for SFTP).
All these credentials should be provided to you by your hosting company. Usually, they are emailed to you during the setup of your server.
Step 2. Once connected, a list of folders and files will appear in the middle pane. Navigate to your website’s public folder and go to /wp-content/plugins where you will find all your installed plugins.
Step 3. To disable a plugin, simply rename its folder by adding a random suffix. For example, wp-super-cache becomes wp-super-cache.old.
On FileZilla, you can rename a folder by right-click on it and choose Rename.
Step 4. Now if you visit the admin dashboard, you should receive a notification that the plugin was deactivated because its file no longer exists.
How to Disable All Plugins?
To deactivate all plugins at once, follow the same steps as explained in the previous method.
You only need to rename the plugins folder to something and then revisit the Plugins admin page.
That’s all, now all your plugins are disabled. Don’t forget to rename the folder back to plugins otherwise, I am not entirely sure if WordPress will just recreate the folder if you try to install a new plugin or throw an error. But either way, it’s a mess you can easily prevent.
Method 3. How to Disable a WordPress Plugin from the Database?
You can also disable WordPress plugins from the database.
This method is slightly more technical compared to the previous method is you should use it only when you don’t have access to the WordPress installation files.
Step 1. To begin, you need first to open the database your website is currently using.
To do that, you will need to use a program like phpMyAdmin (if you have cPanel) or TablePlus.
Once the database is open, you will see a list of all its tables on the left side. All tables are prefixed with the prefix that is defined in the wp-config.php file. In this example, the prefix is wp_ which is the default.
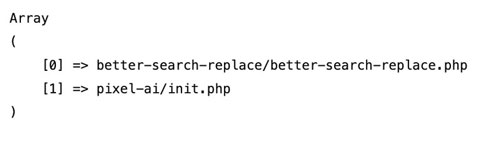
Step 2. Select the {prefix}_options table (wp_options here) and find the row with the option name set to active_plugins.
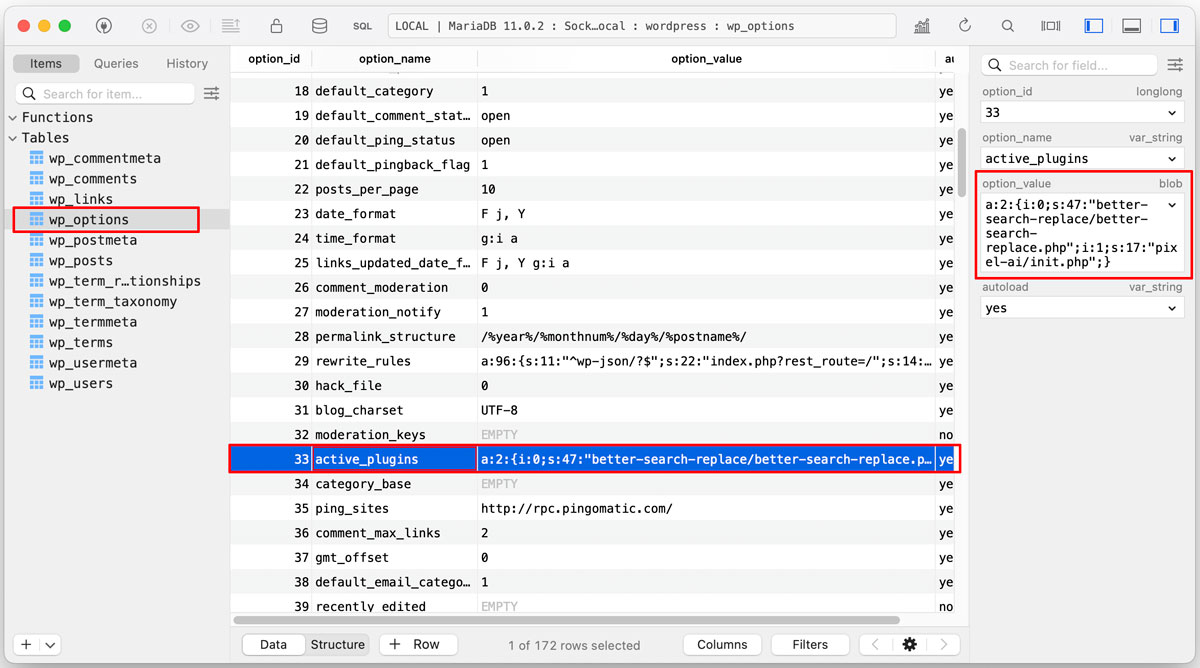
Step 3. The option value of this row is a PHP array encoded by WordPress to be able to save it in the database as a string.
It’s difficult to read the properties of this array in this format. However, if we use a tool like Unserialize to decode it, you will be able to visualize it:
In this method, it’s a lot easier to deactivate all plugins at once than to deactivate selected plugins.
If you want to disable a particular plugin, then you will need to generate a new array in PHP and encode it or edit the encoded value directly which is never recommended. It’s easier to disable all plugins and then reactivate the ones you need from the WordPress dashboard.
To do that, you just need to replace everything in the option_value with a:0:{} which means an empty array, like this:
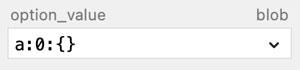
Then click CTRL+S (Cmd+S on macOS) to save your changes.
That’s all, now if you visit the Plugins admin page, you will find all your plugins were disabled.
Method 4. How to Disable a WordPress Plugin using WP-CLI?
The last method to disable WordPress plugins without admin access is to use the WP-CLI (aka the WordPress Command Line Interface).
Assuming you already have the wp-cli installed (also check the quick start guide), CD to your WordPress installation folder using your preferred command line tool and run this command:
wp plugin list
This will display all your installed plugins:
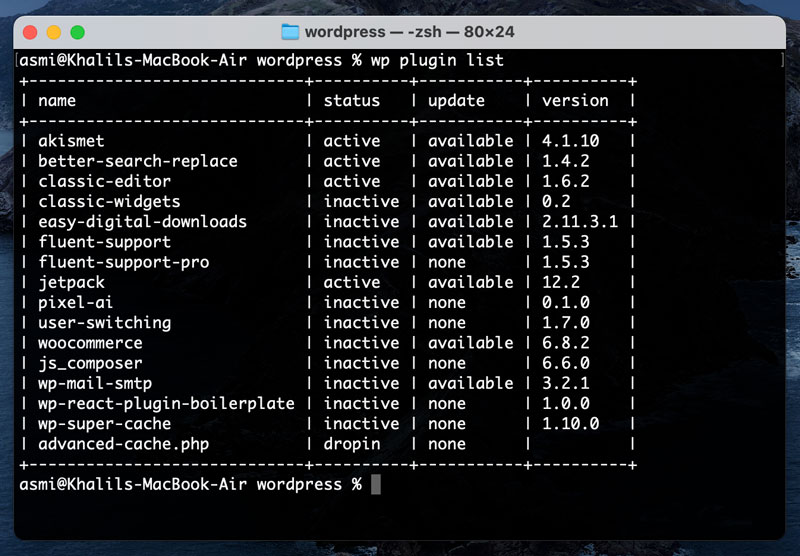
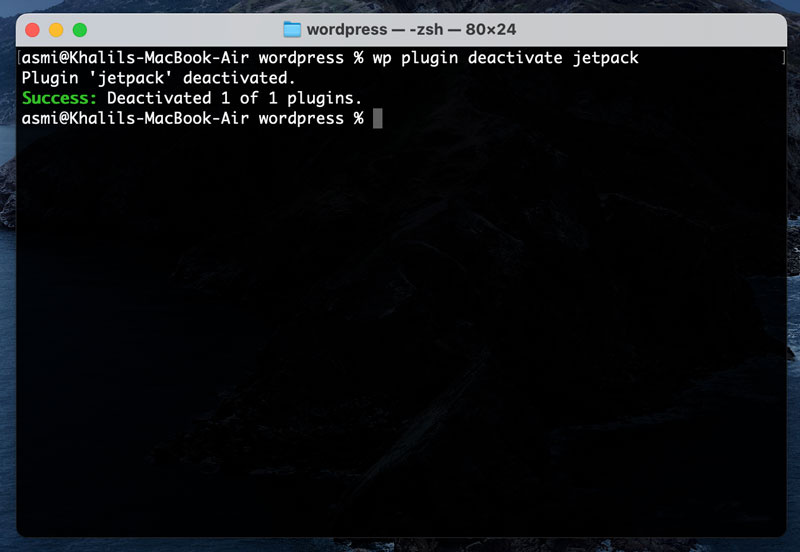
Run wp plugin deactivate command followed by the plugin name to disable it if it’s already active. Copy the name exactly as it appears in the previous screenshot.
wp plugin deactivate jetpack
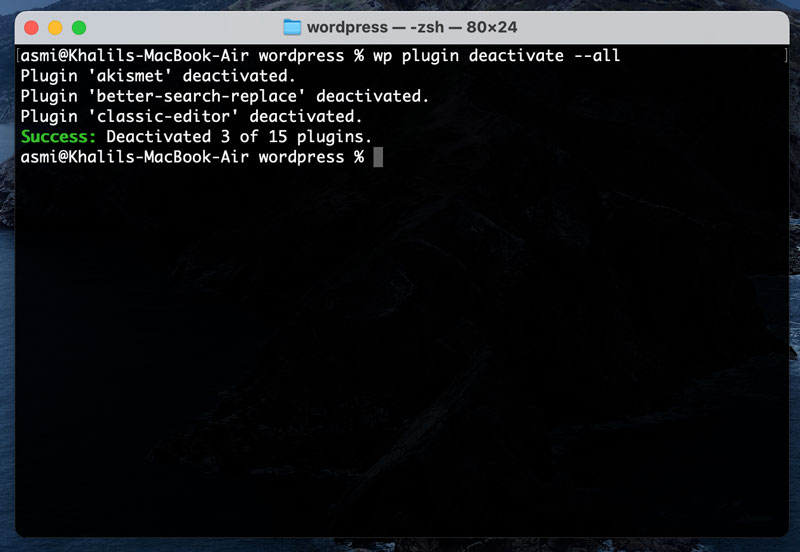
Or run this command if you want to deactivate all plugins at once.
wp plugin deactivate --all
As you can see, the WP-CLI can be quite powerful in getting some tasks done quickly. However, it can be a bit challenging to install, especially for beginners, and requires SSH access.
So follow this method only if you already have WP-CLI installed or the previous methods, for some reason, are not available for you.
Conclusion
And there you have it, 4 different methods to disable WordPress plugins without ever touching the Plugins admin page.
These methods suit all technical levels and even if the first 2 methods are enough for 99% of users, it doesn’t hurt to learn multiple methods to do things in WordPress.


![How to Redirect www to non-www in WordPress? [& Vice Versa]](https://asmi.me/wp-content/uploads/2020/11/wordpress-www-redirect-300x169.jpg)